
Continuous deployment to Kubernetes in Azure DevOps with multi-stage pipelines
I really enjoy Azure DevOps for setting up my builds and releases. One feature, which really isn’t that new (it’s over a year old) is the ability to write both your build and release pipeline as code, using multi-stage pipelines and environments. It’s only recently that I’ve started to get my hands dirty on this however, and it’s wonderful. I adore Kubernetes as an app hosting platform as well, so combining these sounds just too juicy.
In my current job, one of my pet projects have been a wiki that we use across our unit (a couple of hundred people in different roles, from developers to sales). It’s based on Mediawiki, and deploying this was my first dive into Kubernetes back in the day. It has taught me a lot, knowledge that I’ve utilized in my non-pet projects as well. Today I migrated my old build and release pipelines to multi-stage pipelines.
I won’t go through the details of setting up a build pipeline using Yaml - there’s lots of resources for this. Instead I’ll focus on how you connect a Kubernetes cluster to the release stage of your pipeline using environments
About my pipeline
I’ve set up a pipeline with three stages:
- Build
- Release to dev
- Release to prod
The Build stage builds and pushes my Docker image to a container registry, and copies my Kubernetes manifest templates to a build artifact.
name: $(BuildDefinitionName)_$(date:yyyyMMdd)_$(Build.SourceBranchName)$(rev:.r)

trigger:
  batch: true
  branches:
    include:
    - master

pool:
  vmImage: 'ubuntu-latest'

stages:
- stage: Build
  jobs:
  - job: Build
    steps:
    - task: Docker@0
      displayName: 'Build image with extensions'
      inputs:
        containerregistrytype: 'Container Registry'
        dockerRegistryConnection: ****
        dockerFile: wiki/Dockerfile
        imageName: 'wiki:$(Build.BuildId)'
        includeLatestTag: true

    - task: Docker@0
      displayName: 'Push image'
      inputs:
        containerregistrytype: 'Container Registry'
        dockerRegistryConnection: ****
        action: 'Push an image'
        imageName: 'wiki:$(Build.BuildId)'
        includeLatestTag: true

    - task: CopyFiles@2
      displayName: 'Copy Files to: $(build.artifactstagingdirectory)'
      inputs:
        Contents: |
          **/*.template
        TargetFolder: '$(build.artifactstagingdirectory)'

    - task: PublishBuildArtifacts@1
      displayName: 'Publish Artifact: drop'
      inputs:
        PathtoPublish: '$(build.artifactstagingdirectory)'
After this stage is run, I have my image in my Azure Container Registry, and my Kubernetes manifest templates in the “drop” artifact.
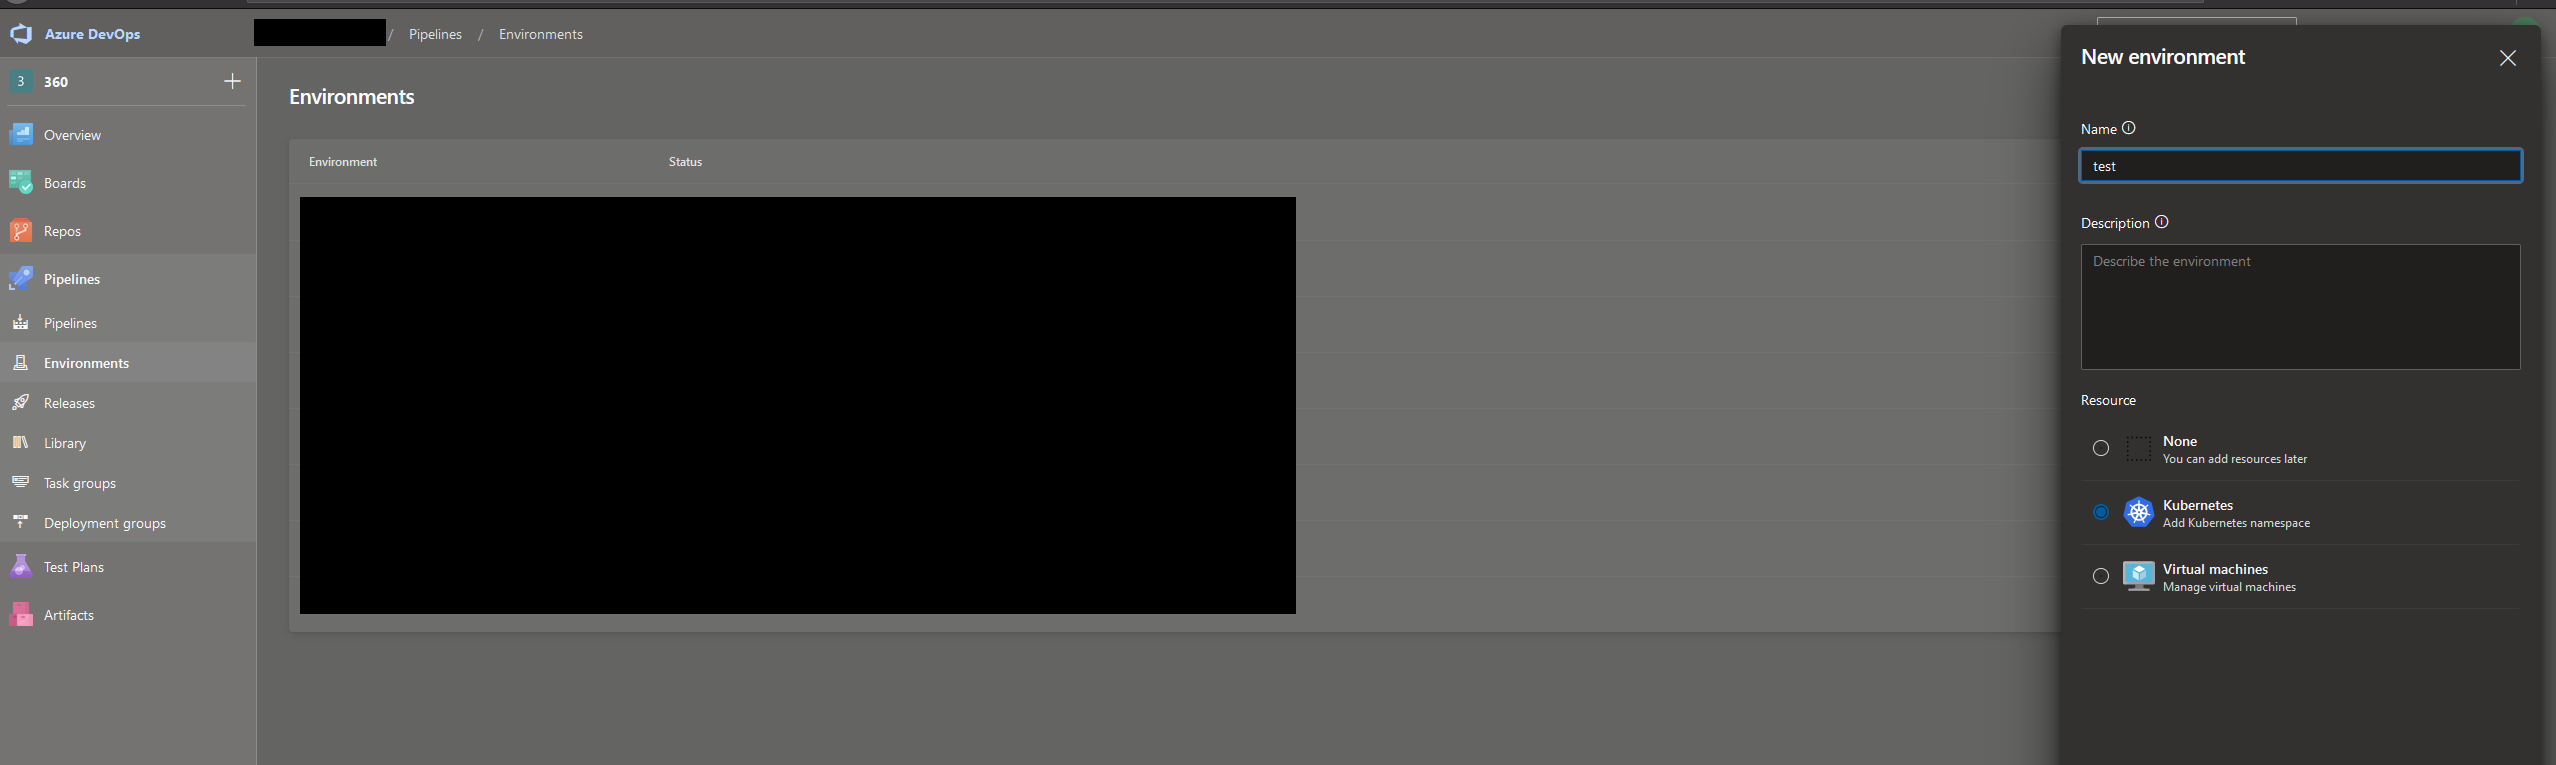
Defining the environment in Azure DevOps
This is super easy. Go to your Azure DevOps project, and under Pipelines go to Environments. In my case, I chose to create an environment with a Kubernetes resource, which is essentially a service connection to a Kubernetes namespace. On the next page, it’s easy if you use AKS for your Kubernetes needs. All your Azure subscriptions will be listed, and you just choose the cluster you want to connect to, and the namespace you want to connect to. After the environment you can refer to this environment in your Yaml pipeline definition.
Using your newly created environment
Now let’s look at the Release to Dev stage. Notice that I’ve connected a variable group as well. This is the only way I’ve found to actually have unique secret variables per stage in a release pipeline. If they’re not secret, it’s probably easiest to include them in the pipeline yaml file itself.
- stage: Release_Dev
  variables:
  # Your variables go here!
  - group: 'foobar - Dev'
  jobs:
  - deployment: Deploy_Wiki_Dev
    environment: test.my-namespace
    strategy:
      runOnce:
        deploy:
          steps:
          - task: KubernetesManifest@0
            displayName: 'kubectl apply wiki deployment'
            inputs:
              action: deploy
              namespace: 'wiki-dev'
              manifests: |
                $(Pipeline.Workspace)/drop/wiki-pods.yml
                $(Pipeline.Workspace)/drop/elasticsearch.yml
There’s a few things going on here. First off, you’ll notice that instead of a “job” under the “jobs”, you’ll see a “deployment”. A deployment, as far as I’ve understood, is just a special kind of job that lets you connect it to an environment, as well as using a variety of deployment strategies for deployment. Once I dig more into this, that could be a topic for another day. Right now I’m just using it as a job to run my tasks.
In essence though, you define the deployment job, and connect that to an environment using the “environment” property. In this example here, I have defined an environment called “test” and a resource in that environment, which is a Kubernetes namespace, called “my-namespace”. On my “test” environment I can set up approvals and other validations. I can also define more Kubernetes namespaces, or even VMs, under the environment through the Azure Pipelines UI.
After the environment, you’ll see a “strategy” node. I just want to run my tasks, so I use “runOnce”, under which there are a “deploy” node, and then finally I can define my build tasks under “steps”. Here I’ve put only a Kubernetes deployment task to deploy my manifest files.
One really cool feature of using deployment jobs with environments, is that the tasks defined for this deployment job inherits the credentials used for the resources in that environment. You may notice that I haven’t put any credentials or any reference to a service connection on the KubernetesManifest task. It’s automatically picked up from the environment, or more specifically the “my-namespace” resource within the environment.
Summing up
I didn’t go into the deepest and darkest details here at all, but I hope you may find this interesting and/or helpful. It certainly is very powerful to both be able to define your build AND release pipelines in code and letting them all be source controlled. I certainly learned a lot, much of which I’m sure I’ll find a good use for in my other projects as well. And I can finally have the build AND deployment code of our wiki version controlled, which is SO useful.
Feel free to reach out if you see an obvious mistake or if you have any comments!
Comments